Binoculars Drawing: Your Ultimate Guide To Mastering Artistic Precision
Have you ever wondered how to create a stunning drawing of binoculars? Well, you're not alone! Many aspiring artists find themselves fascinated by the intricate details and symmetry of binoculars. Whether you're a beginner or an experienced artist, this guide will walk you through every step of creating a masterpiece that will leave everyone in awe.
Drawing binoculars might seem intimidating at first, but trust me, it’s easier than you think. This article will break down the process into simple steps, ensuring that even if you’ve never picked up a pencil before, you’ll be able to create something incredible. So, let’s dive right in and explore the world of artistic possibilities!
Art is all about expression, and what better way to express yourself than by capturing the essence of binoculars on paper? From understanding the anatomy of binoculars to mastering shading techniques, we’ve got you covered. By the end of this article, you’ll have all the tools and knowledge you need to create a drawing that’s both technically impressive and visually appealing.
- Understanding Jonathan Gilberts Height Insights And Information
- Exploring The Height Of Michael C Hall A Comprehensive Analysis
Why Drawing Binoculars Is a Must-Try
Drawing binoculars offers more than just a fun challenge. It helps you develop essential skills such as perspective, proportion, and detail work. These skills are crucial for any artist looking to improve their craft. Plus, the satisfaction of completing a detailed drawing of binoculars is unmatched!
Benefits of Practicing with Binoculars
Let’s take a moment to appreciate why drawing binoculars is such a great exercise:
- Enhances your ability to draw symmetrical objects
- Improves your understanding of light and shadow
- Boosts your confidence in tackling complex subjects
- Refines your attention to detail
So, if you’re ready to level up your drawing skills, let’s get started!
- Quincy Jones Children A Look Into The Family Of A Musical Legend
- Who Was The Love Of George Straits Life
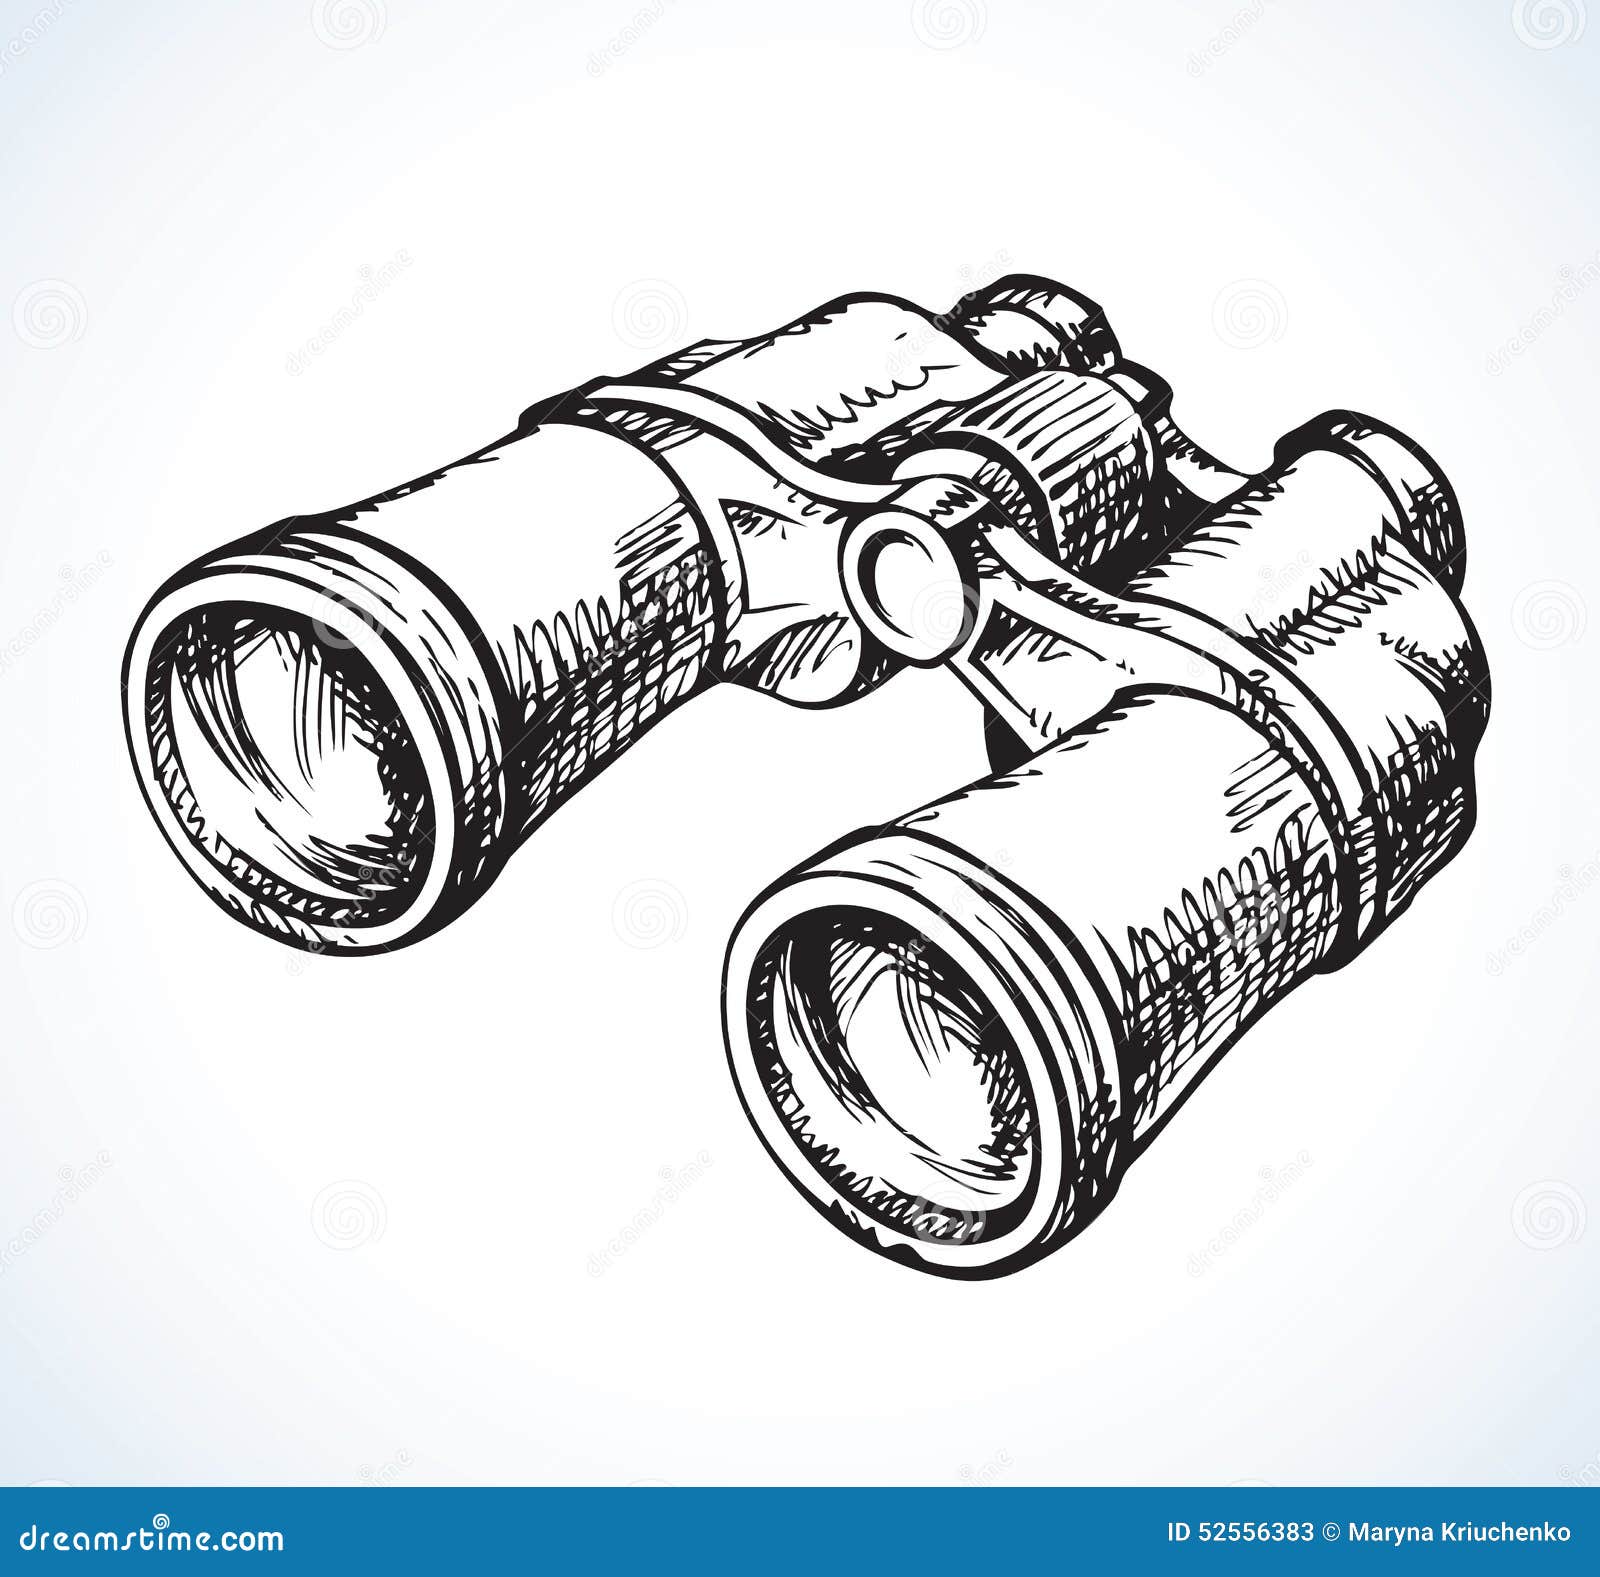
Understanding the Anatomy of Binoculars
Before we dive into the actual drawing process, it’s important to understand the structure of binoculars. Knowing the different parts and how they fit together will make the drawing process much smoother.
Key Components of Binoculars
Here’s a quick breakdown of the main parts:
- Objective Lenses: The large lenses at the front that gather light
- Eye Pieces: The smaller lenses where you place your eyes
- Barrel: The main body that connects the lenses
- Hinge: Allows the binoculars to fold for easy storage
Having a clear picture of these components in your mind will help you maintain proportion and accuracy in your drawing.
Materials You’ll Need for Your Drawing of Binoculars
Now that you know what you’re up against, let’s talk about the tools you’ll need to bring your vision to life. Don’t worry, you don’t need anything fancy – just the basics will do.
Essential Drawing Supplies
Here’s a list of materials you’ll need:
- Pencils (various grades, from HB to 6B)
- Eraser (a kneaded eraser is ideal for fine details)
- Sketchbook or drawing paper
- Blending tools (tortillons or blending stumps)
- Reference photo (optional but highly recommended)
With these supplies in hand, you’re ready to start your artistic journey!
Step-by-Step Guide to Drawing Binoculars
Now comes the fun part – actually drawing the binoculars! Follow these steps carefully, and you’ll be amazed at what you can create.
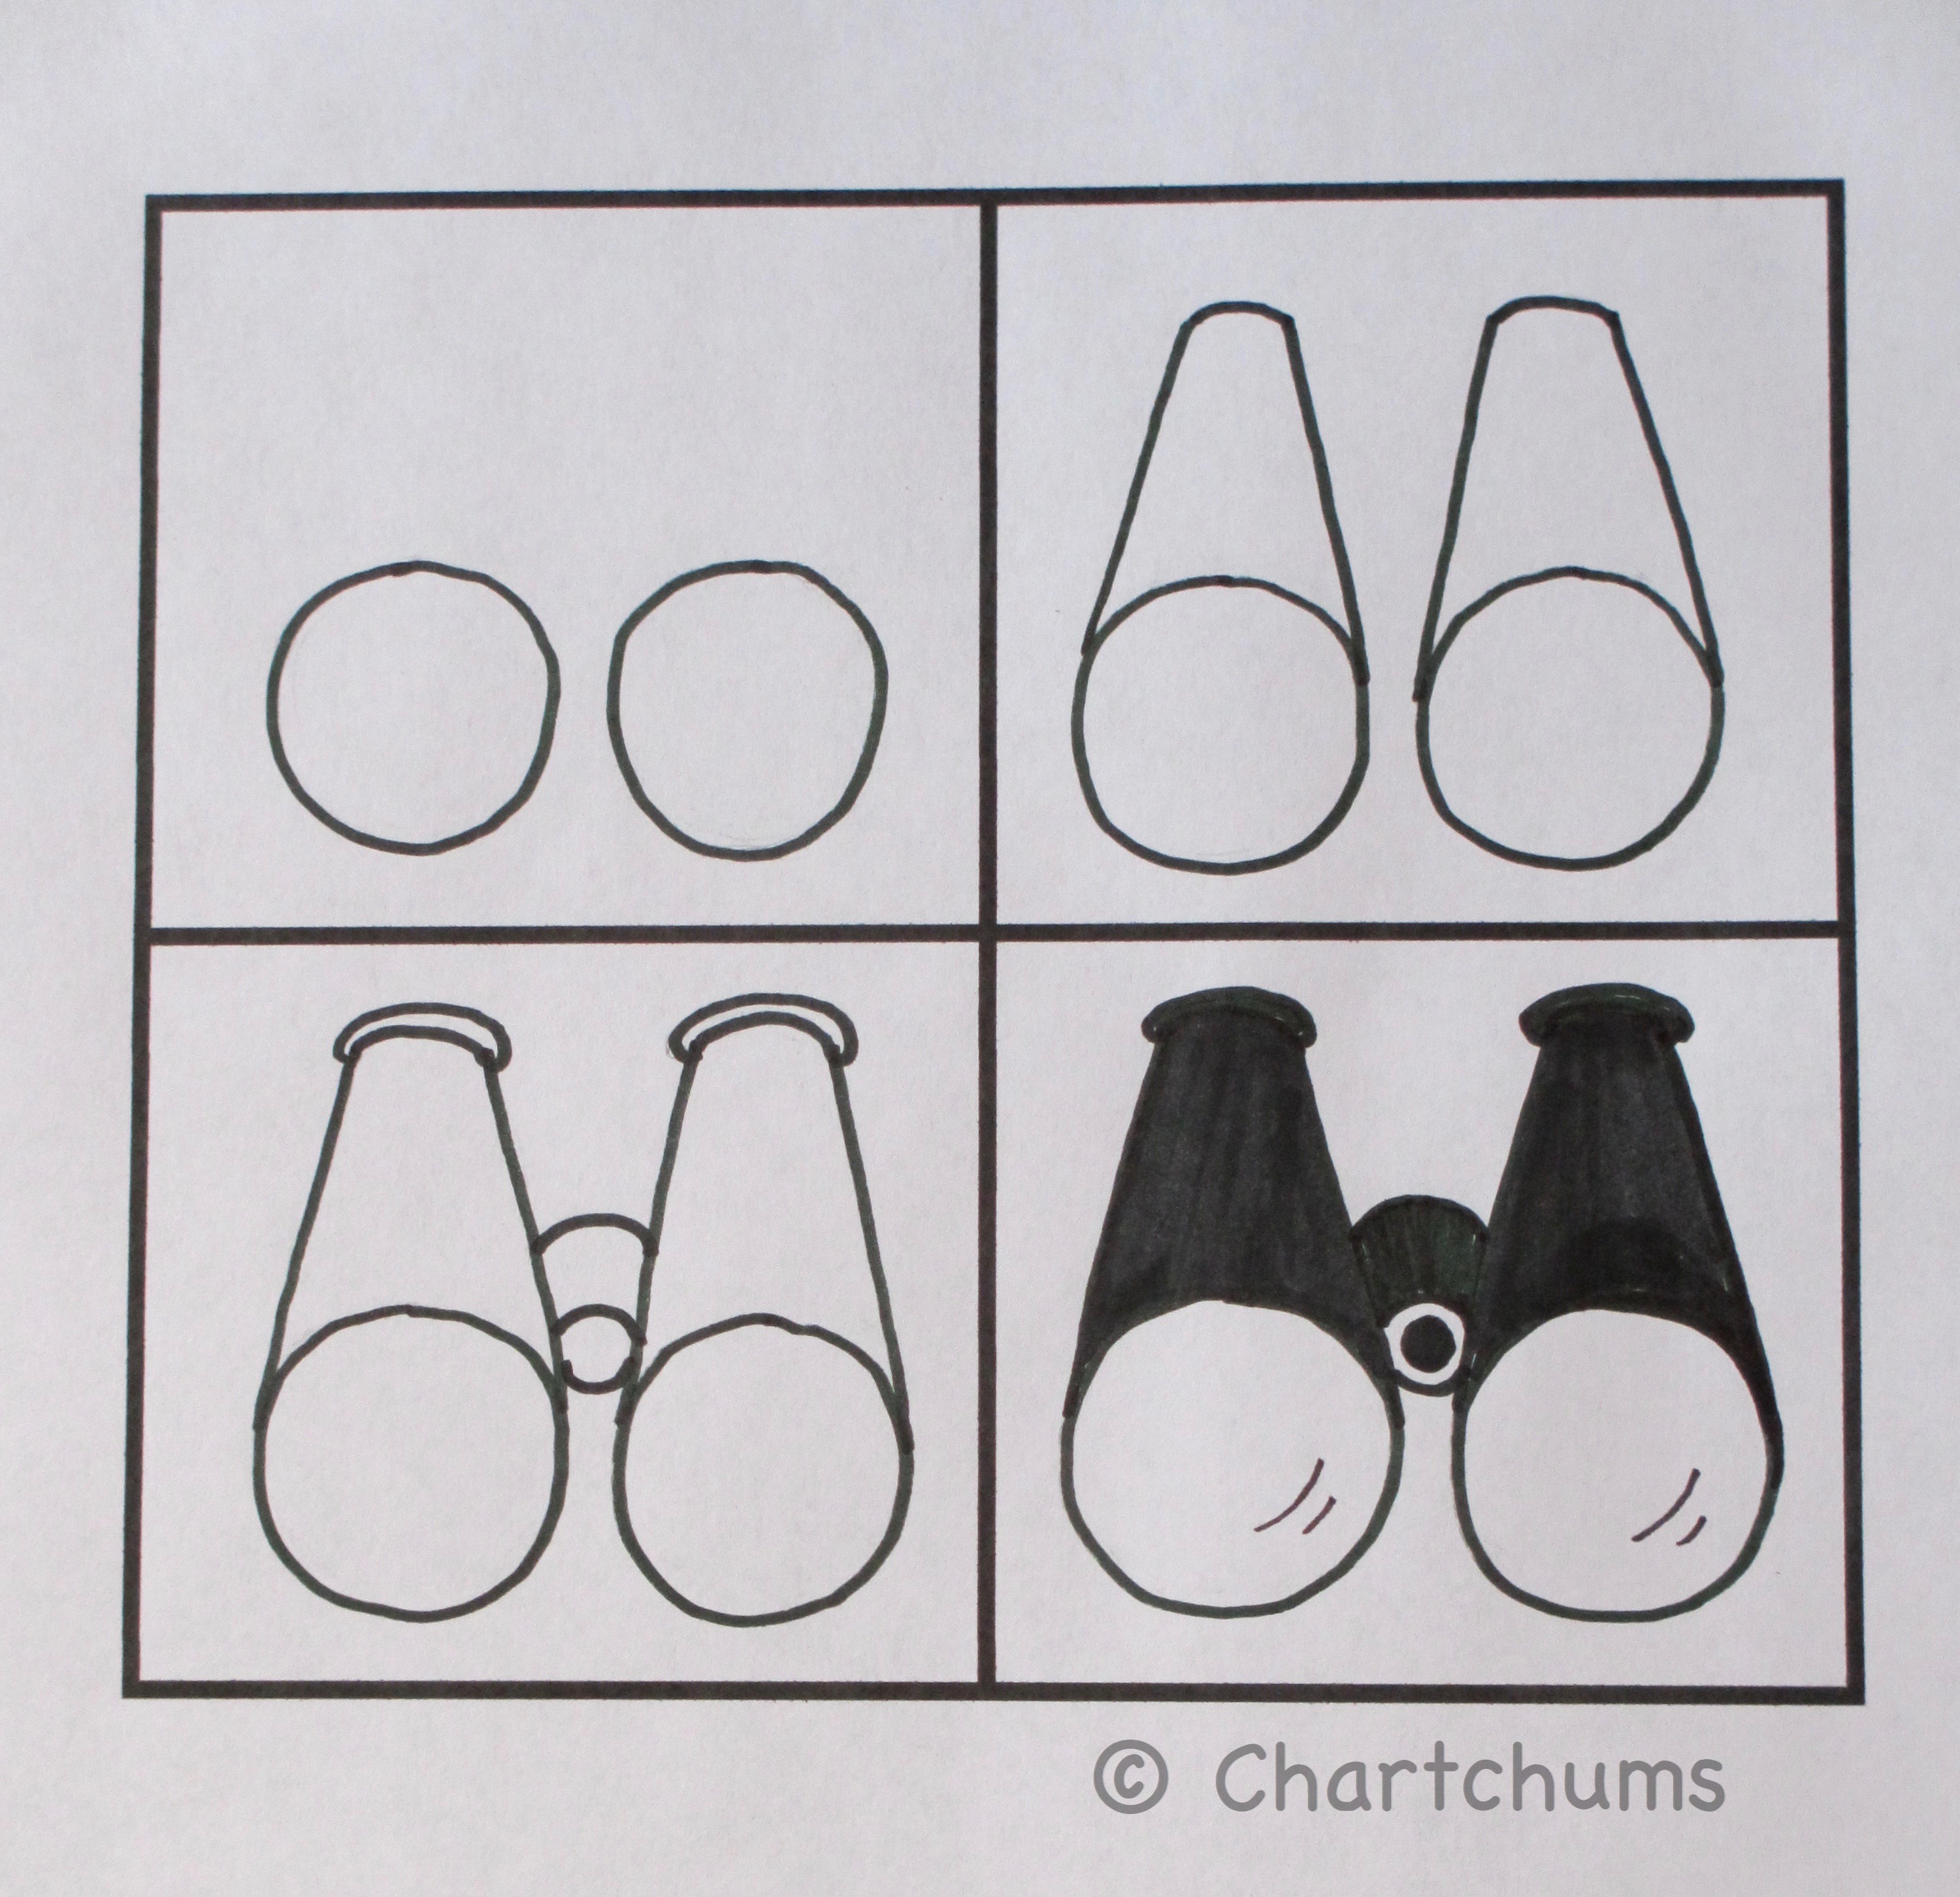
Step 1: Sketch the Basic Shape
Begin by lightly sketching the overall shape of the binoculars. Think of it as a rectangle with rounded edges. This will serve as the foundation for your drawing.
Step 2: Add the Lenses
Once you have the basic shape, draw two circles at each end of the rectangle. These will represent the objective lenses and eye pieces.
Step 3: Define the Barrel
Now, it’s time to add the barrel. Connect the lenses with a smooth, curved line. Make sure to maintain symmetry – this is crucial for a realistic look.
Step 4: Include the Hinge
Don’t forget the hinge! This small detail adds authenticity to your drawing. Sketch a small rectangle in the middle of the barrel to represent the folding mechanism.
Step 5: Add Details
Once the basic structure is in place, start adding details. Pay attention to the texture of the binoculars – most have a rubber coating for grip. Use small, circular strokes to mimic this texture.
Step 6: Shade and Highlight
Shading is where your drawing really comes to life. Use a range of pencil grades to create depth and dimension. Remember, light and shadow are key to making your drawing look realistic.
Tips for Perfecting Your Binocular Drawing
Here are a few tips to help you take your binocular drawing to the next level:
- Study reference photos to understand how light interacts with the surface of binoculars
- Practice drawing symmetry by using a ruler or grid
- Experiment with different shading techniques to find what works best for you
- Don’t be afraid to make mistakes – they’re part of the learning process
Remember, practice makes perfect. The more you draw, the better you’ll become.
Common Mistakes to Avoid
Even the best artists make mistakes, but being aware of them can help you avoid them in the future. Here are some common pitfalls to watch out for:
- Forgetting to maintain symmetry
- Over-shading, which can make your drawing look muddy
- Ignoring the importance of light sources
- Not paying attention to proportions
By keeping these mistakes in mind, you’ll be able to create a more polished and professional-looking drawing.
Advanced Techniques for Drawing Binoculars
Once you’ve mastered the basics, it’s time to explore some advanced techniques that will elevate your drawing skills:
Adding Reflections
Binocular lenses are highly reflective, so adding reflections can make your drawing look more realistic. Use a white gel pen or correction fluid to create highlights on the lenses.
Creating Depth with Cross-Hatching
Cross-hatching is a technique where you layer lines in different directions to create depth and texture. This works particularly well for shading the barrel of the binoculars.
Conclusion: Your Journey to Artistic Mastery
And there you have it – everything you need to know to create a stunning drawing of binoculars. From understanding the anatomy of binoculars to mastering advanced shading techniques, you now have the skills to bring your artistic vision to life.
Remember, art is a journey, not a destination. Keep practicing, experimenting, and most importantly, have fun! If you enjoyed this guide, feel free to share it with your fellow artists or leave a comment below. Who knows, your next masterpiece might just inspire someone else to pick up a pencil and start drawing!
So, what are you waiting for? Grab your pencils and let’s get drawing!
Table of Contents
- Why Drawing Binoculars Is a Must-Try
- Understanding the Anatomy of Binoculars
- Materials You’ll Need for Your Drawing of Binoculars
- Step-by-Step Guide to Drawing Binoculars
- Tips for Perfecting Your Binocular Drawing
- Common Mistakes to Avoid
- Advanced Techniques for Drawing Binoculars
- Conclusion: Your Journey to Artistic Mastery
- Michael Keatons Son A Glimpse Into The Life Of Sean Douglas
- Brian Johnson Height Exploring The Rock Legends Stature And Impact
Binoculars Drawing at Explore collection of

Binoculars Drawing at Explore collection of
Binoculars Drawing Stock Illustrations 2,112 Binoculars Drawing Stock
